1、图片目录设置: 假定服务器主目录为nginx的默认目录:/usr/local/nginx-0.8.32/html/
图片存放目录为:/usr/local/nginx-0.8.32/html/SD/images
图片缓存目录为:/usr/local/nginx-0.8.32/html/SD/images_cache
图片临时目录为:/usr/local/nginx-0.8.32/html/SD/images_temp
SD意义为项目中使用的代称,可以忽略其意义
在nginx缓存配置成功之后,如果用户成功获取了一次图片文件,就会缓存到images_cache目录下
2、nginx服务器配置: 所需软件包如下:
nginx-0.8
ngx_cache_purge-1.0
pcre-8.20
1
2
3
4
5
6
7
8
9
10
11
12
13
14
15
16
17
18
19
tar zxvf pcre-8.20.tar.gz cd pcre-8.20/ ./configure make && make install cd ../ tar zxvf ngx_cache_purge-1.0.tar.gz tar zxvf nginx-0.8.32.tar.gz cd nginx-0.8.32/ ./configure --user=www --group=www \ --add-module= ../ngx_cache_purge-1.0 \ --prefix=/usr/local/webserver/nginx \ --with-http_stub_status_module \ --with-http_ssl_module \ --with-openssl=/usr/local/openssl-1 .0.1 make && make install
如果在nginx执行make的过程中出现如下错误:
1
2
3
make [1 ]: *** [objs/addon/ngx_cache_purge-1.2 /ngx_cache_purge_module.o] Error 1 make [1 ]: Leaving directory '/root/nginx-1.0 .5 ' make : *** [build] Error 2
则是由于nginx版本的问题。我之前用的是比较新的nginx1.2版本, 结果总是出现上述Error信息,于是更换回旧版本之后Error消失。至于具体原因,暂未深入研究。
3、对nginx进行配置 Nginx.conf代码
1 2 3 4 5 6 7 8 9 10 11 12 13 14 15 16 17 18 19 20 21 22 23 24 25 26 27 28 29 30 31 32 33 34 35 36 37 38 39 40 41 42 43 44 45 46 47 48 49 50 51 52 53 54 55 56 57 58 59 60 61 62 63 64 65 66 67 68 69 70 71 72 73 74 75 76 77 78 79 80 81 82 83 84 85 86 87 88 89 90 91 92 93 94 user www www; worker_processes 8 ; error_log /usr/ local/nginx-0.8.32/ logs/error.log crit; pid /usr/ local/nginx-0.8.32/ nginx.pid; events { use epoll; worker_connections 65535 ; } http { include mime.types; default_type application/octet-stream; charset utf-8 ; server_names_hash_bucket_size 128 ; client_header_buffer_size 32 k; large_client_header_buffers 4 32 k; client_max_body_size 300 m; sendfile on; tcp_nopush on; keepalive_timeout 60 ; tcp_nodelay on; client_body_buffer_size 512 k; proxy_connect_timeout 5 ; proxy_read_timeout 60 ; proxy_send_timeout 5 ; proxy_buffer_size 16 k; proxy_buffers 4 64 k; proxy_busy_buffers_size 128 k; proxy_temp_file_write_size 128 k; gzip on; gzip_min_length 1 k; gzip_buffers 4 16 k; gzip_http_version 1.1 ; gzip_comp_level 2 ; gzip_types text/plain application/ x-javascript text/css application/ xml; gzip_vary on; proxy_temp_path /usr/ local/nginx-0.8.32/ html/SD/im ages_temp; proxy_cache_path /usr/ local/nginx-0.8.32/ html/SD/im ages_cache levels=1 :2 keys_zone=cache_one:200 m inactive=1 d max_size=30 g; server { listen 80 ; server_name 192.168 .0.146 ; location / { proxy_cache cache_one; proxy_cache_valid 200 304 12 h; proxy_cache_key $host $uri $is_args $args ; proxy_set_header Host $host ; proxy_set_header X-Forwarded-For $remote_addr ; proxy_pass http:// 192.168 .0.146 :8080 ; log_format cache '***$time_local ' '***$upstream_cache_status ' '***Cache-Control: $upstream_http_cache_control ' '***Expires: $upstream_http_expires ' '***"$request" ($status) ' '***"$http_user_agent" ' ; access_log /usr/ local/nginx-0.8.32/ logs/cache.log cache; expires 1 d; } location ~ /purge(/ .*) { allow 127.0 .0.1 ; allow 192.168 .0.0 /16 ; deny all; proxy_cache_purge cache_one $host $1 $is_args $args ; } location ~ .*\.(php|jsp|cgi)?$ { proxy_set_header Host $host ; proxy_set_header X-Forwarded-For $remote_addr ; proxy_pass http:// 192.168 .0.146 :8080 ; } access_log off; } server{ listen 8080 ; server_name 192.168 .33.243 ; location / { root /usr/ local/webapp; } access_log off; } }
修改完成之后,可以在nginx/sbin目录下执行./nginx -t命令来检查配置文件是否正确,当现实如下信息时即表示配置成功。
1
2
the configuration file /usr/ local/nginx-0.8.32/ conf/nginx.conf syntax is ok configuration file /usr/ local/nginx-0.8.32/ conf/nginx.conf test is successful
4、测试及验证 在nginx/sbin目录下执行./nginx即可启动nginx
在浏览器里直接输入ip地址之后显示如下界面即表示成功启动:
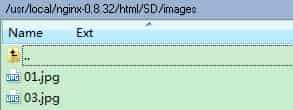
在图片存放目录images下面存放了如下图片:
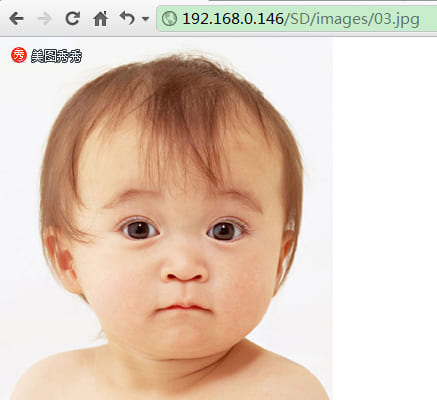
在浏览器里输入请求图片的地址:http://192.168.0.146/webapp/images/03.jpg 即可成功显示图片:
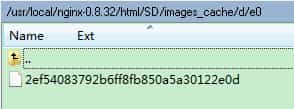
此时我们可以看到在images_cache下面生成了缓存文件:proxy_cache_key $host$uri$is_args$args;
另外,我们还可以根据nginx.conf文件中配置的日志来确定我们的请求是否命中缓存:
第一次请求的时候,我们可以看到miss
第二次请求的时候,我们就可以看到hit命中了
1
2
3
4
5
6
7
8
9
10
11
12
13
14
15
16
17
18
19
20
21
22
23
24
25
26
27
28
29
server { listen 80 ; server_name douco.com; location / { index index.php index.html index.htm; proxy_set_header Host $host ; proxy_set_header X-Forwarded-For $remote_addr ; proxy_pass http://192.168.253.137:80; } location ~ .*\.(gif|jpg|jpeg|png|bmp|swf|js|css)$ { index index.php index.html index.htm; proxy_cache cache_one; proxy_cache_valid 200 304 12h ; proxy_cache_key $host $uri $is_args $args ; proxy_set_header Host $host ; proxy_set_header X-Forwarded-For $remote_addr ; proxy_pass http://192.168.253.137:80; access_log /var/www/logs/cache.log cache; expires 1d ; } location ~ /purge(/.*) { allow 127.0.0.1 ; deny all; proxy_cache_purge cache_one $host $1 $is_args $args ; } }