前言
最近在阅读冴羽老师的文章时,对个人博客很感兴趣,于是试着自己搭建了一遍,写了这篇文章记录一下搭建的基本流程,希望对大家有所帮助。
原文链接:一篇带你用 VuePress + Github Pages 搭建博客
1. 本地搭建
- 创建并进入一个新目录
1 | mkdir vuepress-starter |
- 使用你喜欢的包管理器进行初始化
1 | npm init -y |
- 将 VuePress 安装为本地依赖
1 | npm install -D vuepress |
- 创建你的第一篇文档
1 | mkdir docs |
- 在
package.json中添加一些scripts
1 | "scripts": { |
- 在本地启动服务器
1 | npm run docs:dev |
VuePress 会在 http://localhost:8080 启动一个热重载的开发服务器
这时可能会出现文字乱码情况,需要把 README.md 的编码格式改为 UTF-8
2. 基础配置
在 docs 文件夹下添加 .vuepress 目录,所有 VuePress 相关的文件都会被放在这里。在 .vuepress 文件夹下添加 config.js,配置网站的标题和描述,方便 SEO,此时你的目录结构可能是这样:
1 | |-- docs', |
config.js 文件的内容如下(标题和描述自定义):
1 | module.exports = { |
3. 添加导航栏
我们现在在首页的右上角添加导航栏,修改 config.js:
1 | module.exports = { |
此时界面如下:
4. 添加侧边栏
现在我们添加一些 md 文档,内容自行添加,文档的目录结构如下:
1 | |-- docs', |
我们在 config.js 添加如下配置:
1 | module.exports = { |
此时页面如下: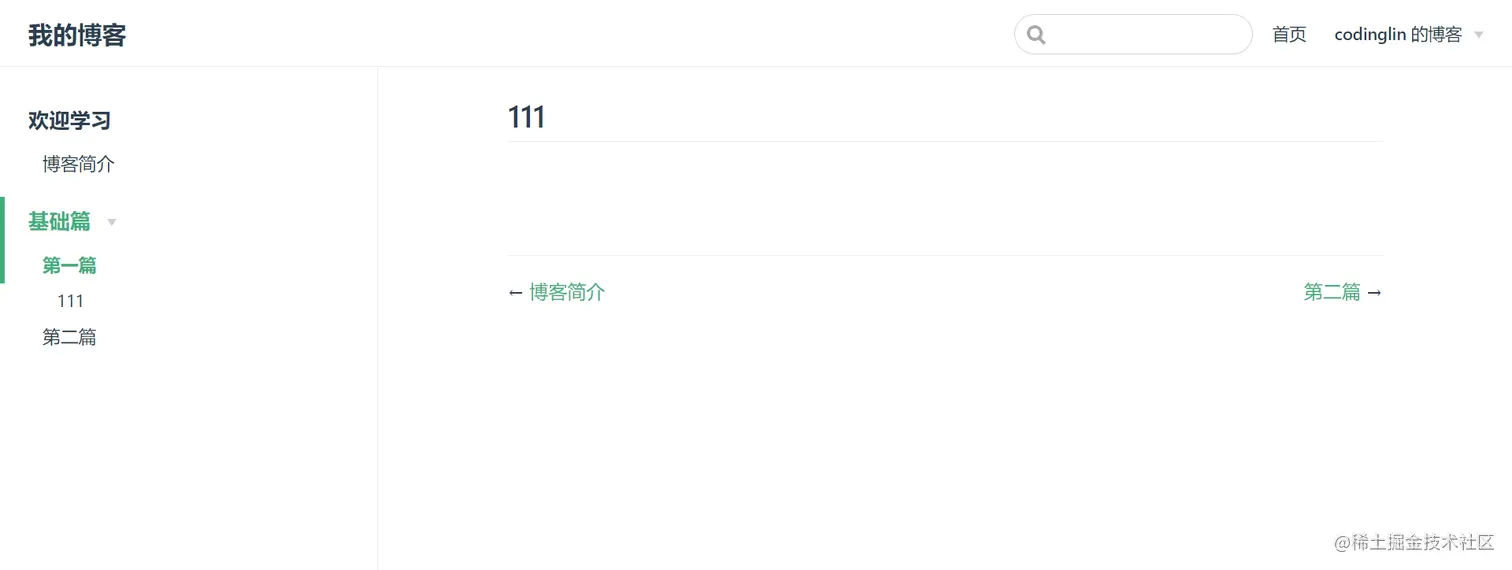
5. 更换主题
现在基本的目录和导航功能已经实现,如果还想要 loading效果、切换动画、模式切换(暗黑模式)、返回顶部、评论等功能呢,为了简化开发成本,我们可以直接使用主题,我使用的主题是 vuepress-theme-reco:
现在我们安装 vuepress-theme-reco:
1 | npm install vuepress-theme-reco --save-dev |
然后在 config.js 中引用该主题:
1 | module.exports = { |
配置好之后,可以看到自己的博客网站新增了一些功能,例如模式切换: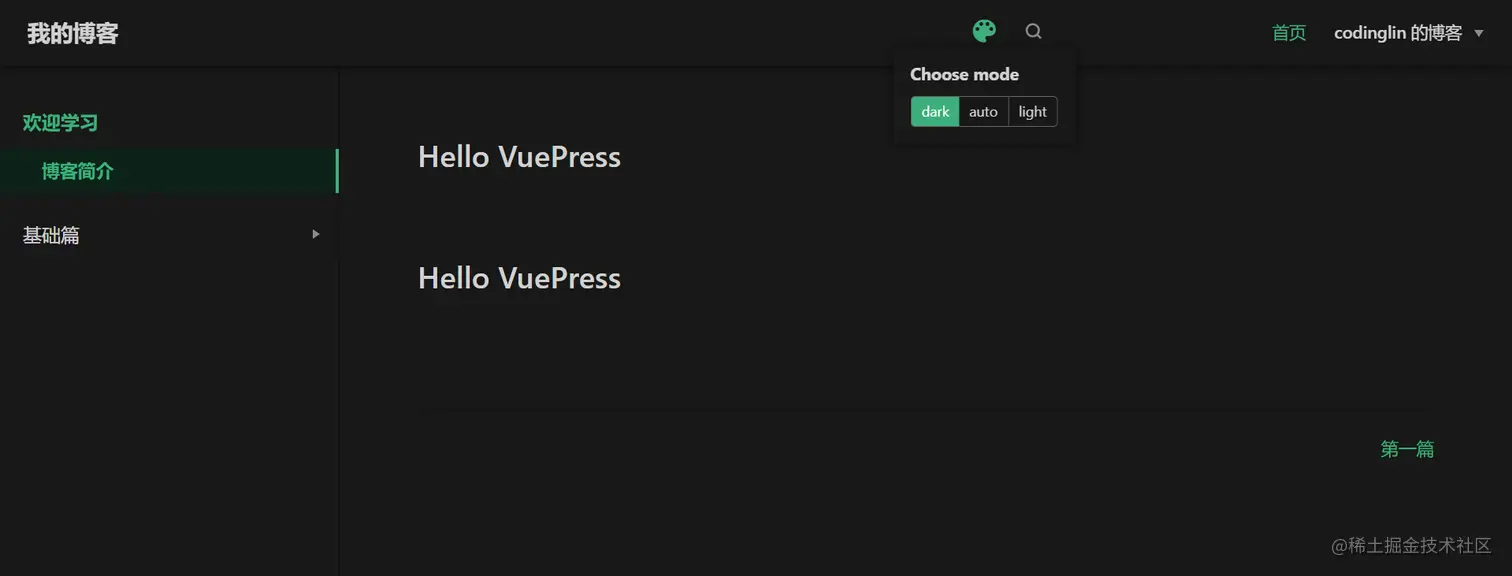
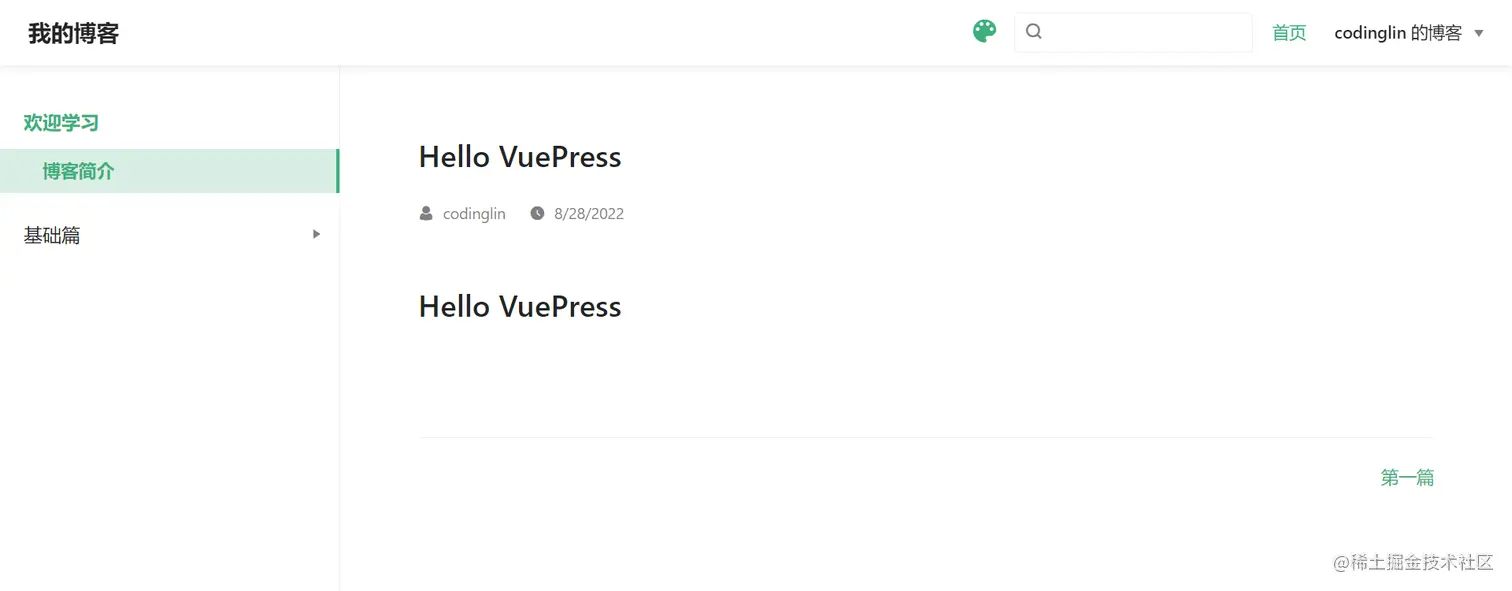
6. 添加文章信息
我们会发现,一篇文章竟然出现了两遍标题,这是因为这个主题自动提取了第一个大标题作为本文的标题,我们可以在每篇文章的 md 文件中添加一些信息修改:
1 | yaml |
效果如下:
7. 设置语言
文章时间,我们写入的格式为 2022-8-28 ,但是显示的是 8/28/2022,这是因为 VuePress 默认的 lang 为 en-US,我们修改一下 config.js:
1 | module.exports = { |
可以发现时间格式发生了变化:
8. 开启目录结构
在原本的主题里,我们发现每篇文章的目录结构在左侧,而 vuepress-theme-reco 将原有的侧边栏的中的多级标题移出,生成子侧边栏,放在了页面的右侧,如果你要全局开启,可在 config.js 中设置开启:
1 | module.exports = { |
9. 修改主题颜色
VuePress 基于 Vue,所以主题色用的是 Vue 的绿色,你也可以将主题颜色修改为你自己喜欢的颜色,你可以创建一个 .vuepress/styles/palette.styl 文件,文件代码如下:
1 | $accentColor = #3178c6 |
效果如下: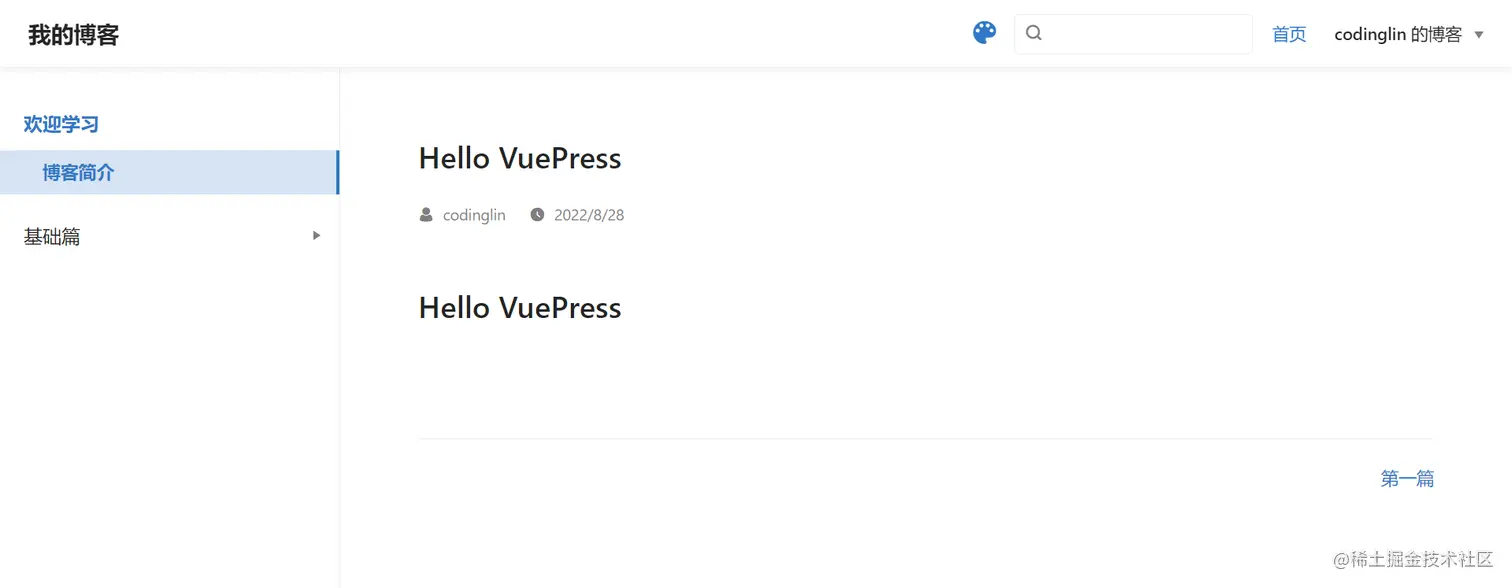
更多颜色的修改请参考 palette.styl
10. 自定义修改样式
我们发现用作强调的文字颜色比较暗淡,在暗黑模式下看不清楚,如何修改这个文字的颜色和背景色呢?
你可以创建一个 .vuepress/styles/index.styl 文件,文件代码如下:
1 | .dark .content__default code { |
如果想要隐藏每篇文章的标题、作者、时间呢,其实也是类似的方式:
1 | .page .page-title { |
效果如下: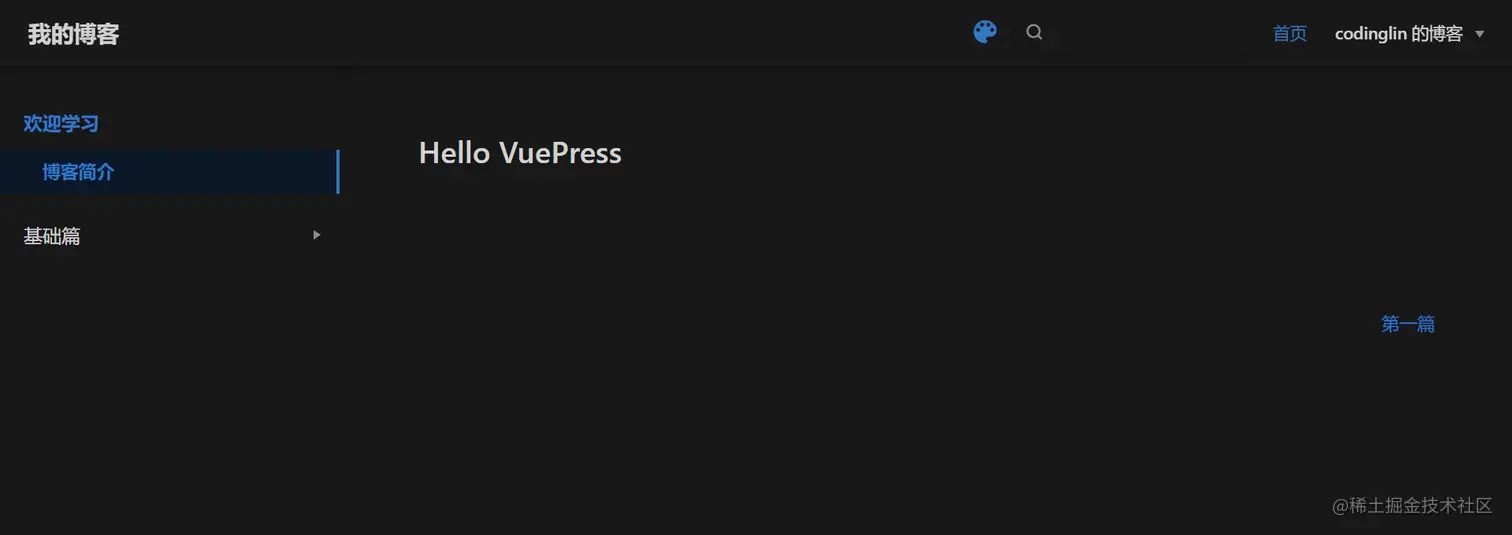
11. 部署
到这里,我们的博客网站基本搭建好了,接下来我们将它部署到 Github Pages 上。我们首先在 Github 上新建一个仓库,这里我取名为:interview。
相应地,我们需要在 config.js 添加一个 base 路径配置:
1 | module.exports = { |
最终的 config.js 的内容为:
1 | module.exports = { |
然后我们在项目 vuepress-starter 目录下创建一个脚本文件 deploy.sh,注意修改一下对应的用户名和仓库名:
1 |
|
新建一个终端,选择 Git Bash,进入主目录,并执行 sh deploy.sh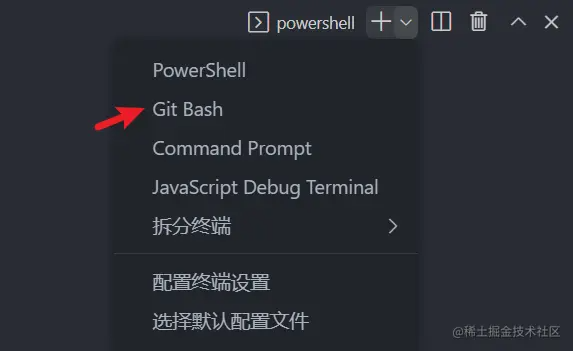
1 | cd vuepress-starter |
项目就会开始构建,然后上传到远程仓库上。
我们可以在仓库的 Settings -> Pages 中看到最后的地址: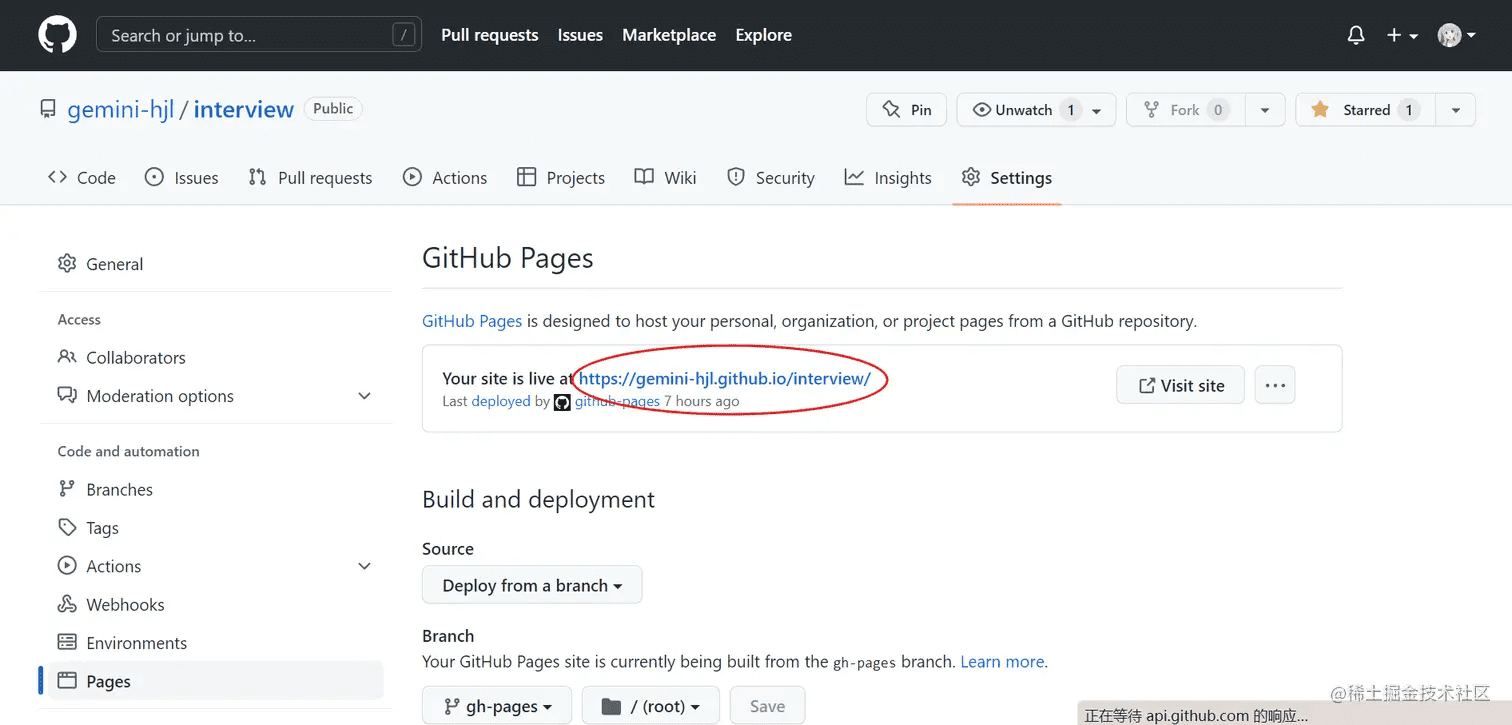
最后生成的地址:coding-lin.github.io/interview/
至此,我们完成了 VuePress 和 Github Pages 的部署。
如果大家想要丰富自己的个人博客的话,可以去安装一些插件,地址如下:搭建 VuePress 博客,你可能会用到的一些插件
更新之后的博客:coding-lin.github.io/blog/ ,博客代码已上传到 github,欢迎大家 star!